Installation
Warning
If external power of the SentiBoard is utilized with the 2-pin Molex power connector on the SentiBoard, please make sure the USB_PWR jumper is detached. When SentiBoard is utilized without an external power source, it can be powered from the host computer over USB by attaching the USB_PWR jumper.
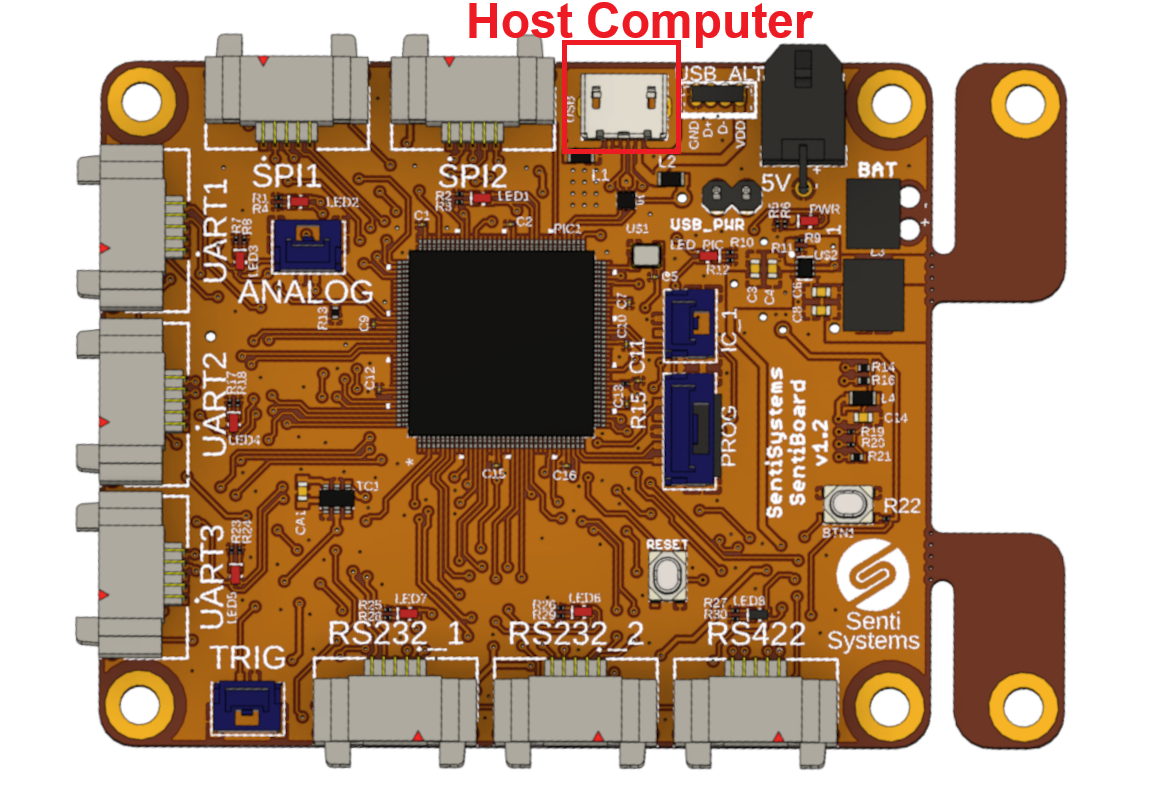
- Connect the SentiBoard to a computer running Ubuntu Linux via the microUSB connector on the SentiBoard. 1
- Make sure that the SentiBoard is powered, either by attaching external power, or by adding the jumper USB_PWR
- The SentiBoard should show up as
/dev/ttyACMxor/dev/ttyUSBxwherexis a number. To see this number, checkdmesg | tail - Make sure you have permissions to read from and write to the device. This is done by writing for example
ls -la /dev/ttyACMxand verifying that you are a member of the group of the device. - The SentiBoard should also show up in
lsusbwith vendor id04D8and product idE77AorEF83. - Install the udev-rule from the SharePoint folder:
sudo cp <sharepoint_folder>/etc/80-sentiboard.rules /etc/udev/rules.d/(link to 80-sentiboard.rules) - You might need to either restart udev (
sudo service udev restart) or log out your user and log back in. Disconnect and reconnect the SentiBoard (or press the reset button) to trigger the udev-rule. - The SentiBoard should now show up as
/dev/ttySentiboard00(the configuration interface) and/dev/ttySentiboard02(the data transfer interface). - Now you can use the SentiBoard, SentiUtils, and other scripts and software provided with your product. To configure the SentiBoard, use the command-line interface. If you have a sensor connected you can try to show the device's rate using
scripts/senti_dump.py
-
Other OS-es than Ubuntu Linux will work, but it is more difficult to obtain a fixed name for the device. In Linux you can use an udev-rule to create a symbolic name, while OS X and Windows do not have an easy solution for this ↩